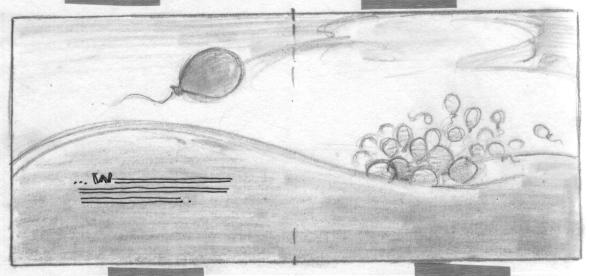
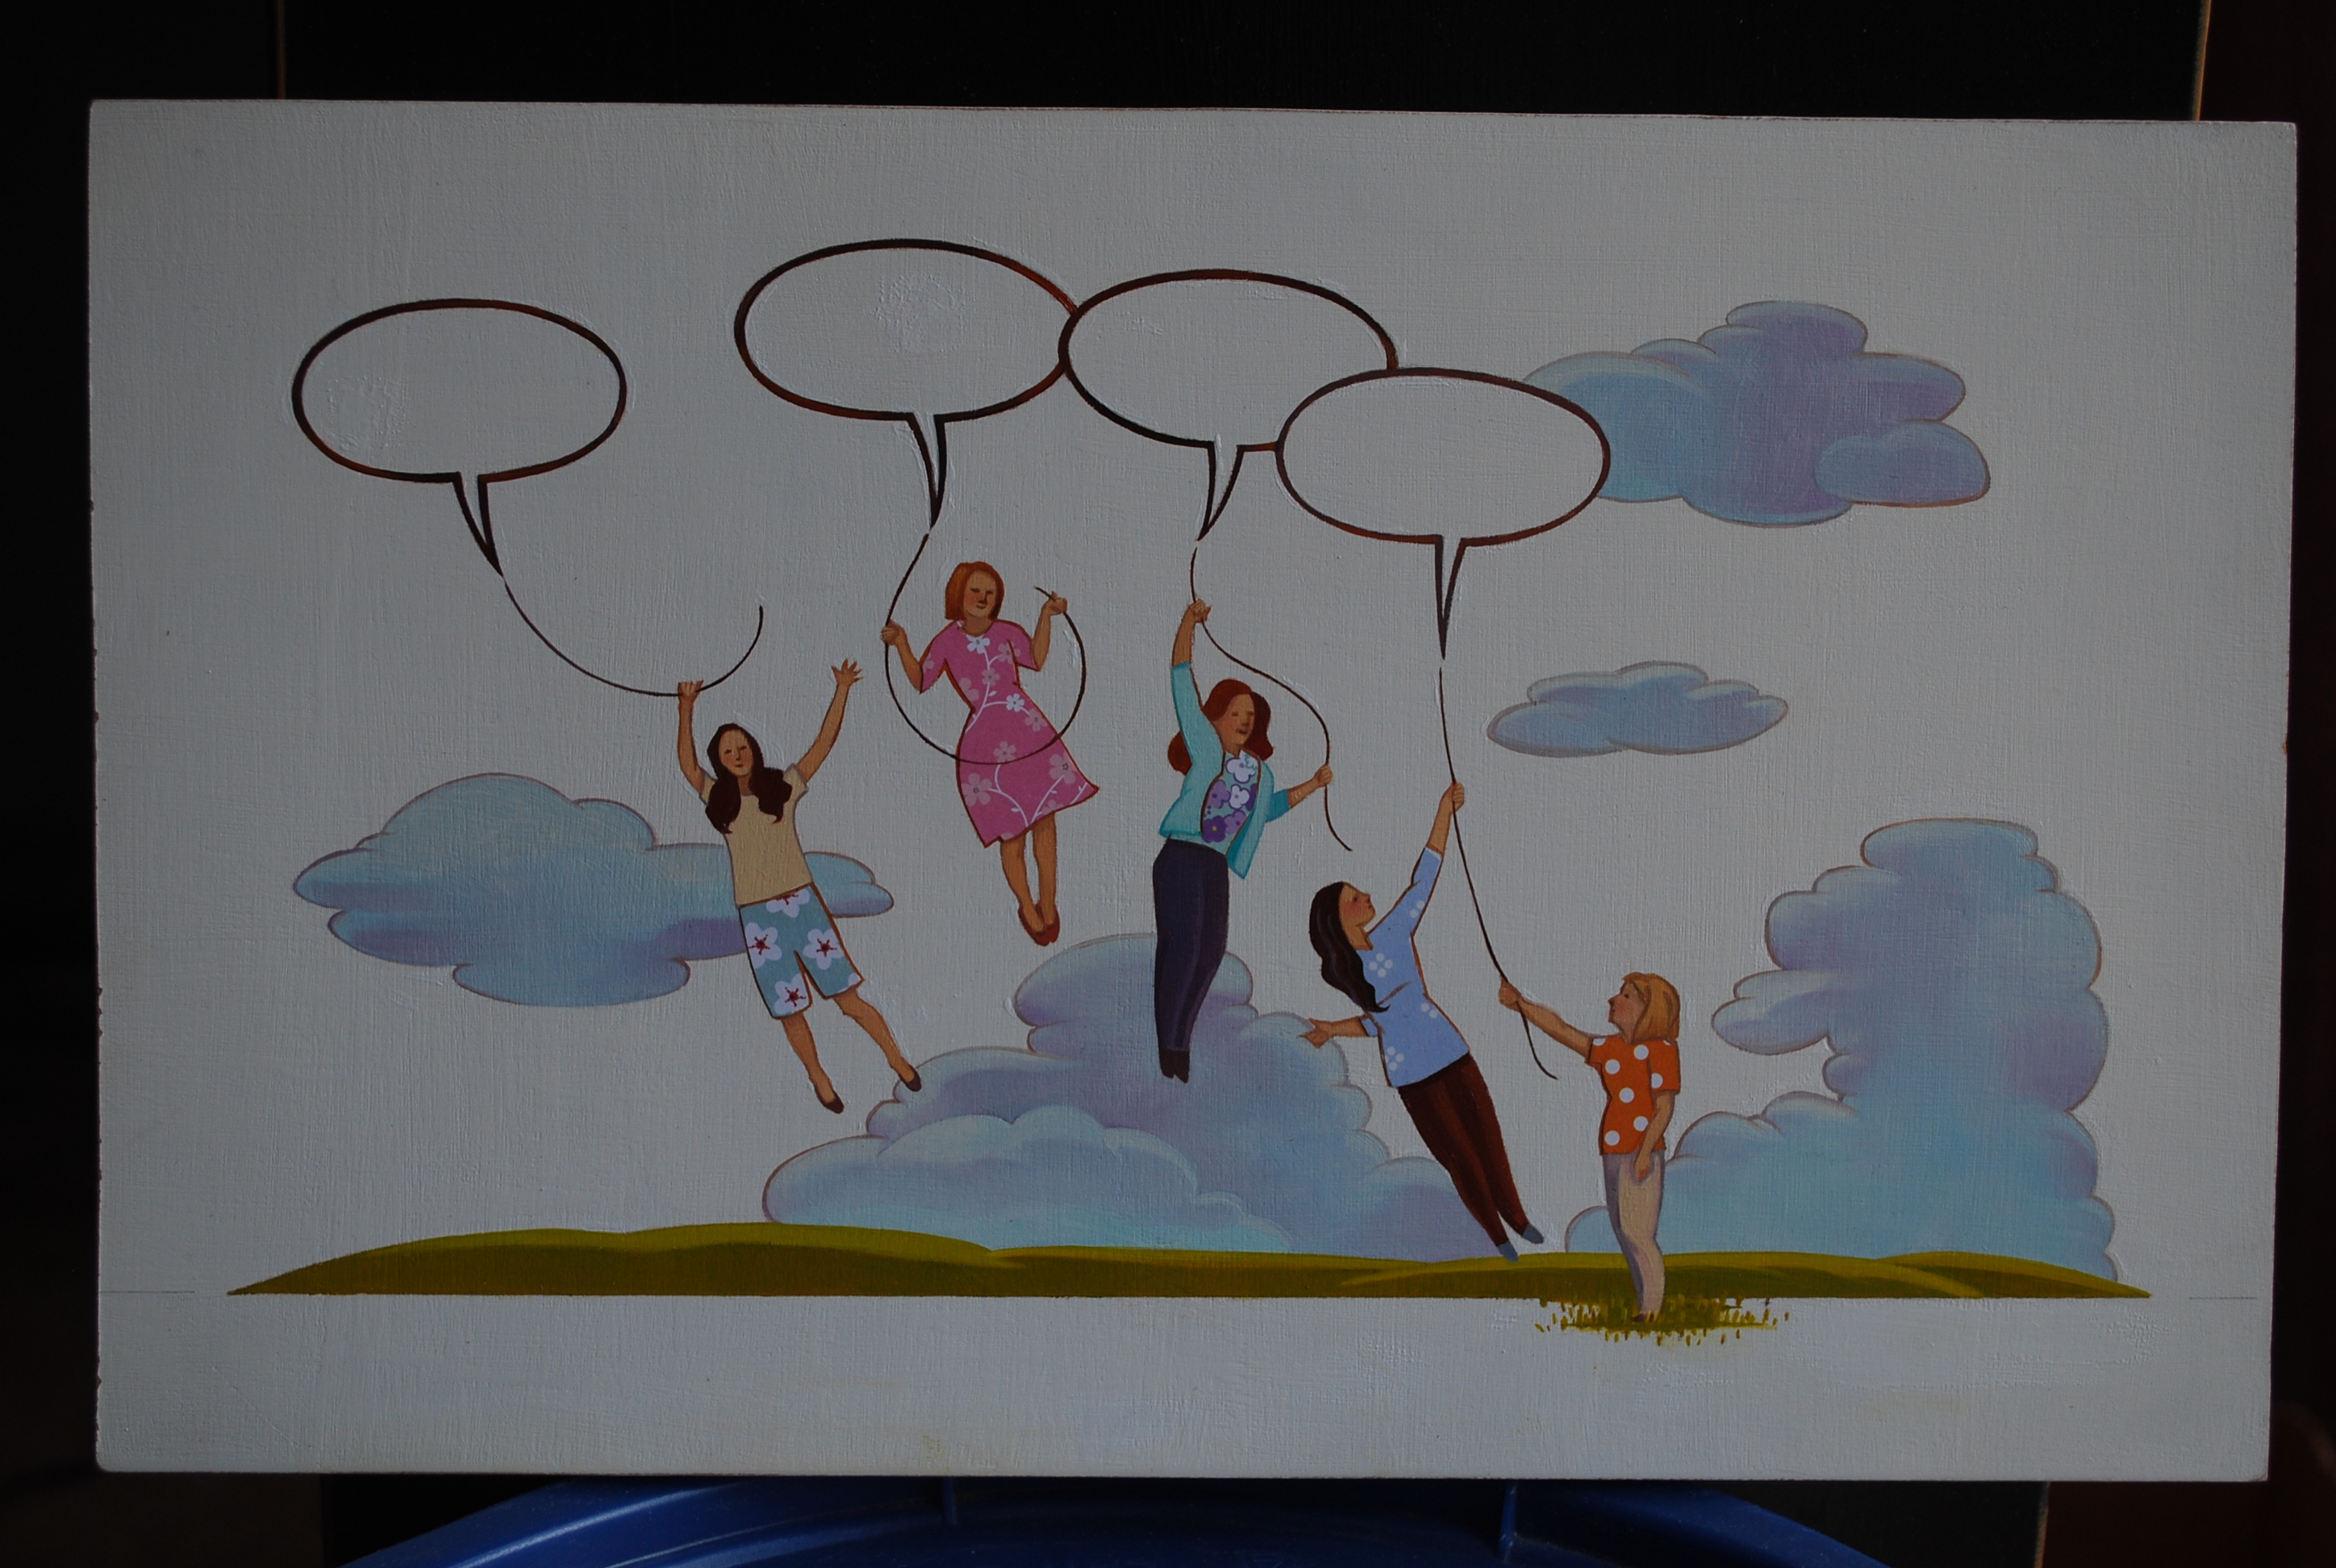
 Is an artist’s or a writer’s “work” ever really complete?! I heard a story once that the famous impressionist painter, Edgar Degas, stealthily climbed in the window of a patron that had bought one of his pieces to repaint the parts of the painting he just couldn’t live with. Maybe urban legend. However, as I took the coaching of that first rejection and looked again at my stories I began to see through a different filter. Just as an example I am posting the “before and after” of the ending to my story: “Around The Corner”. The bottom sketch shows the balloon lazily drifting to join a party of balloons in the land where lost balloons go. A very anti-climax kind of ending. This is the BEFORE. The top sketch is the REWORK and shows the balloon having a very different kind of adventure . . . with a little humor. This is the AFTER. MUCH more interesting! Well, reworked the whole story with new energy and yesterday, May 8, I pushed the “send” button two more times. Sent this story to TWO more possible literary agents. The line: “You have to do the work to do the work!” keeps running through my mind. A BIG thank you to my husband, Mike; my daughter, Katie; and various encouraging art friends. I am on a roll.
Latest
My first REJECTION in finding an agent for my author/illustrator life!
On the 19th of February, after the cat and tears drama previously reported, I pushed the first “send” button to electronically submit three of my stories to the first agency I applied to for representation. Since they indicated a 30 DAY response time, I, of course, anxiously checked my emails daily and boldly (or desperately) emailed the question to the agency: “Did you receive my submissions?” on the 26th DAY. Within a couple of hours I got an apologetic response of “we have no record of your submission”. Good thing I asked! The agent was very courteous, gave me a direct email to send my stuff to and answered me within 6 days with my first REJECTION!! Yay! I am on my way! Actually he was kind and gave me some instructive observations about my work. Then he added: “thx for submitting. i enjoyed these more than most.” (The world of email punctuation.) A little encouragement is fuel-to-the-fire. Back to the drawing and thinking boards I went.
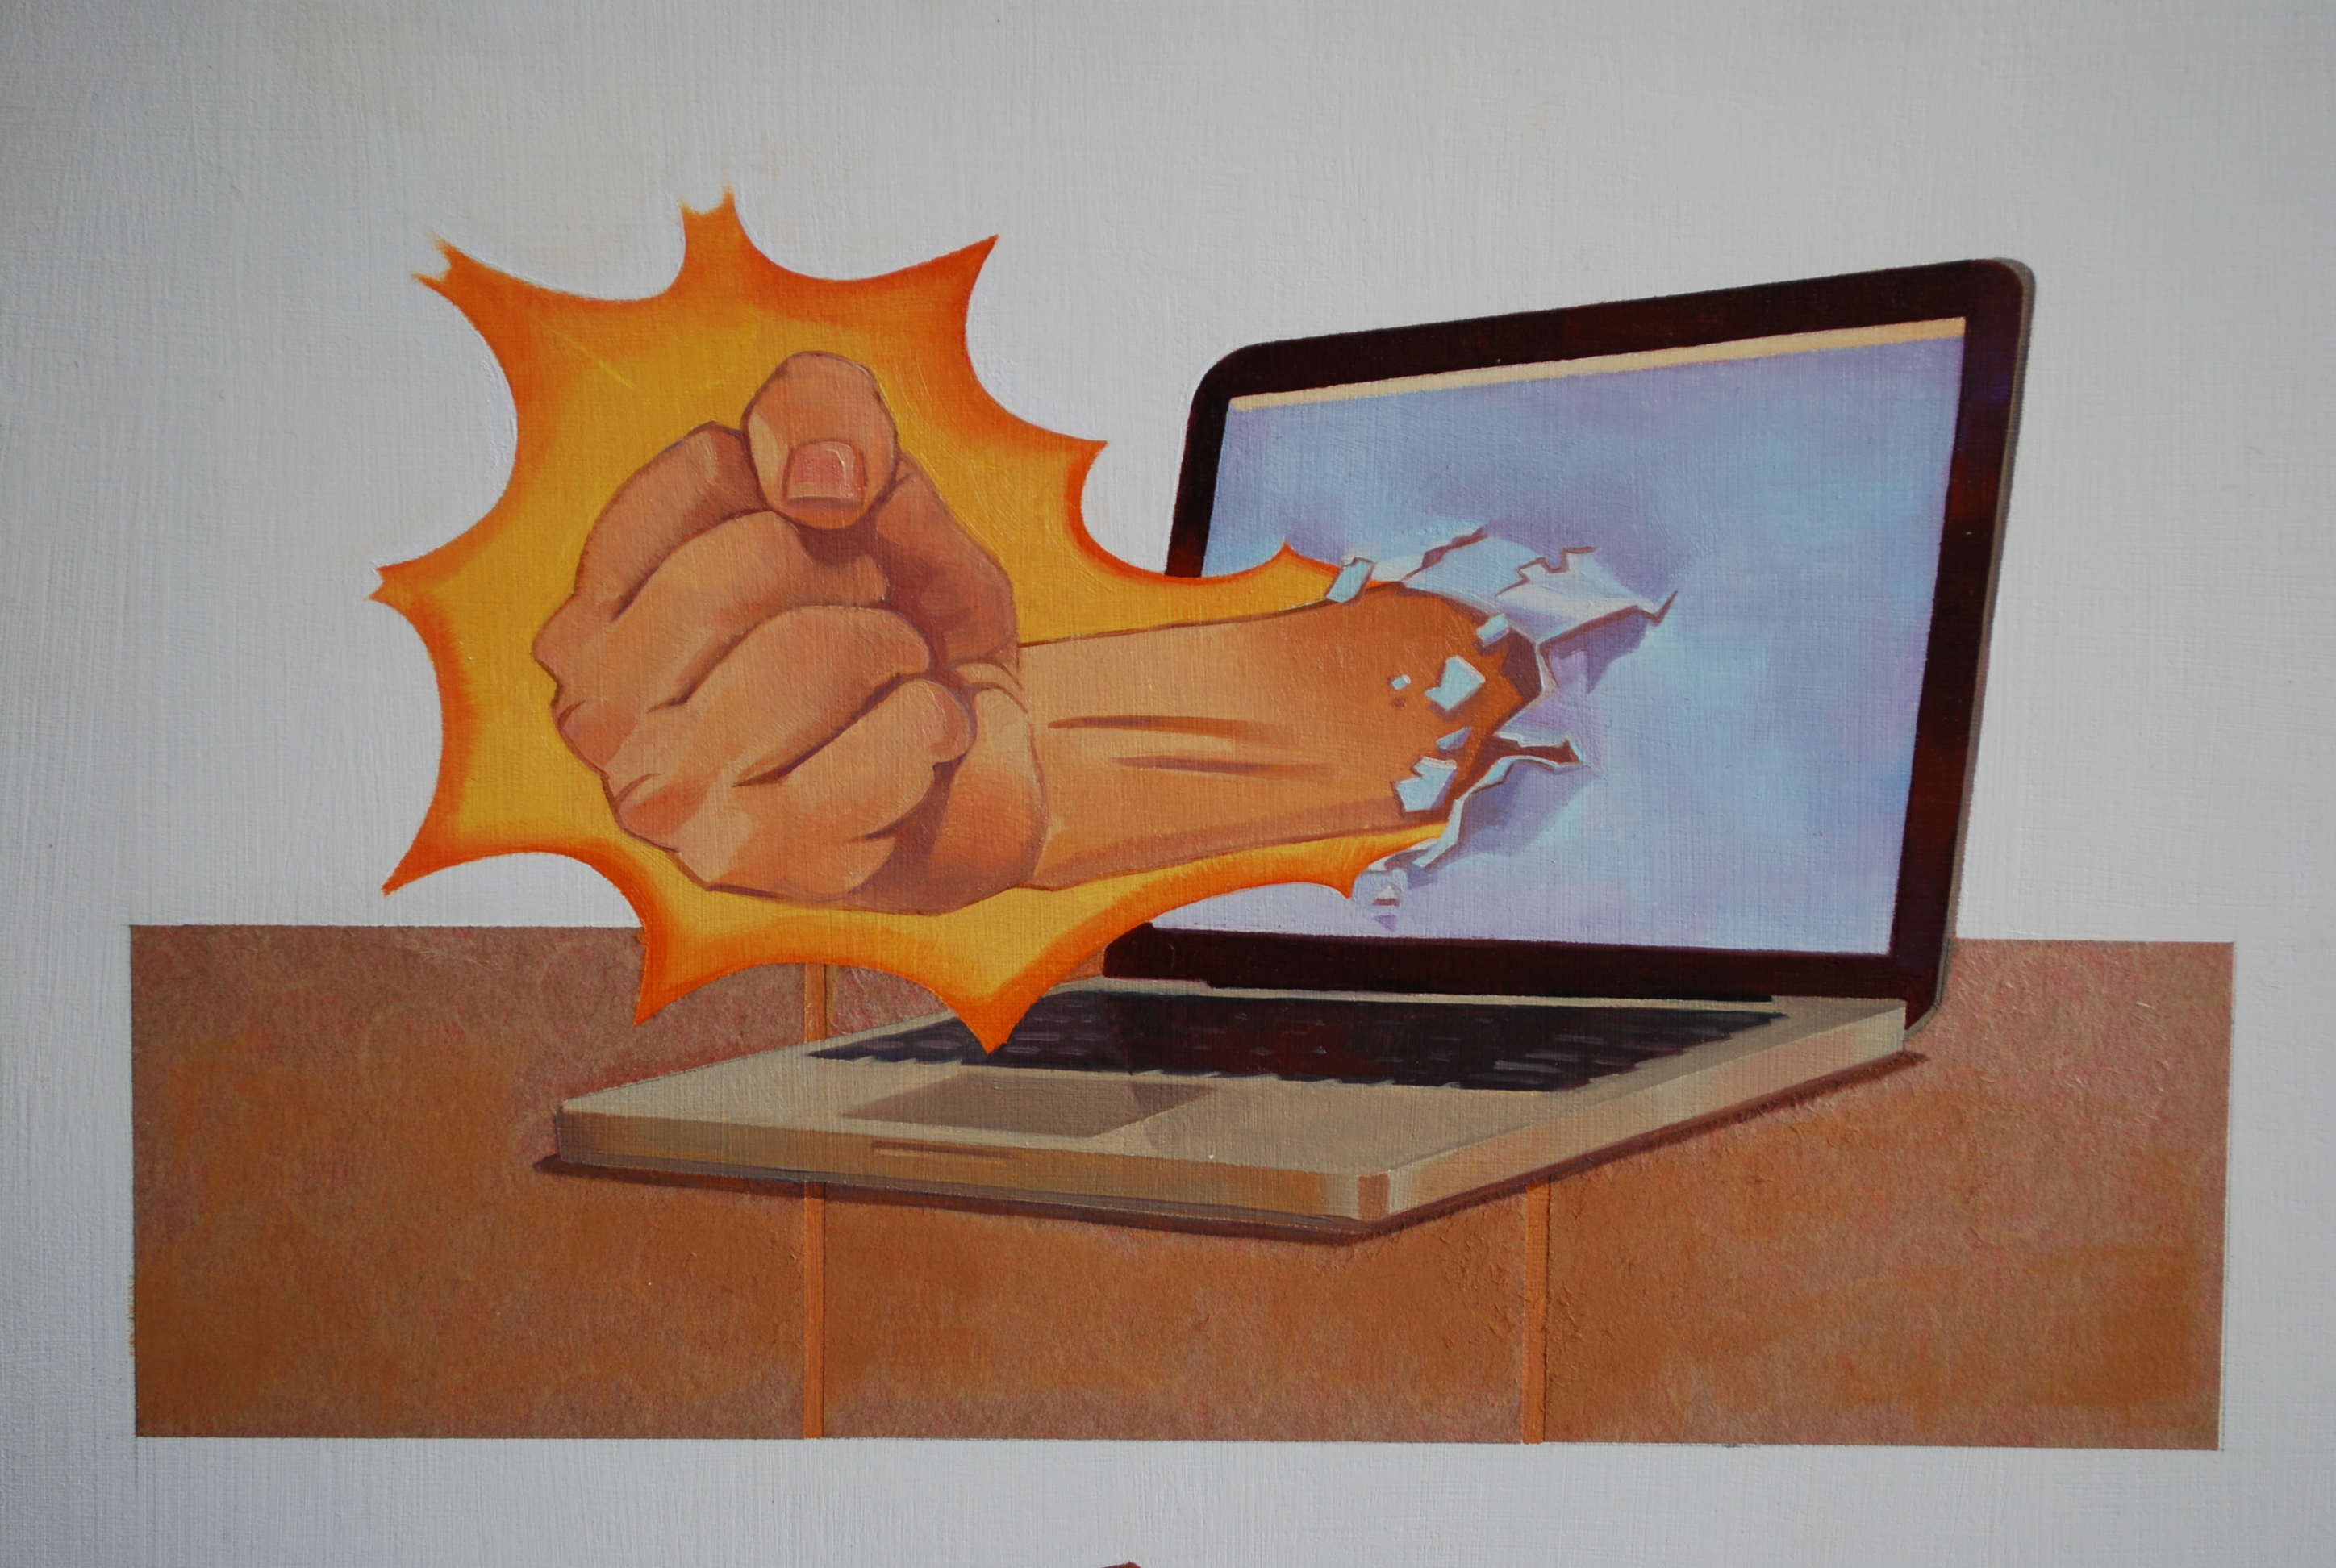
An interesting illustration job about corrupt communication. Hot off the art table. Oil and collage. What we say can tear down or build “float” us up. And then there is cyber-bullying.
The Greek root for the word sarcasm is sarkazein and means “to tear flesh like dogs”. Ouch.

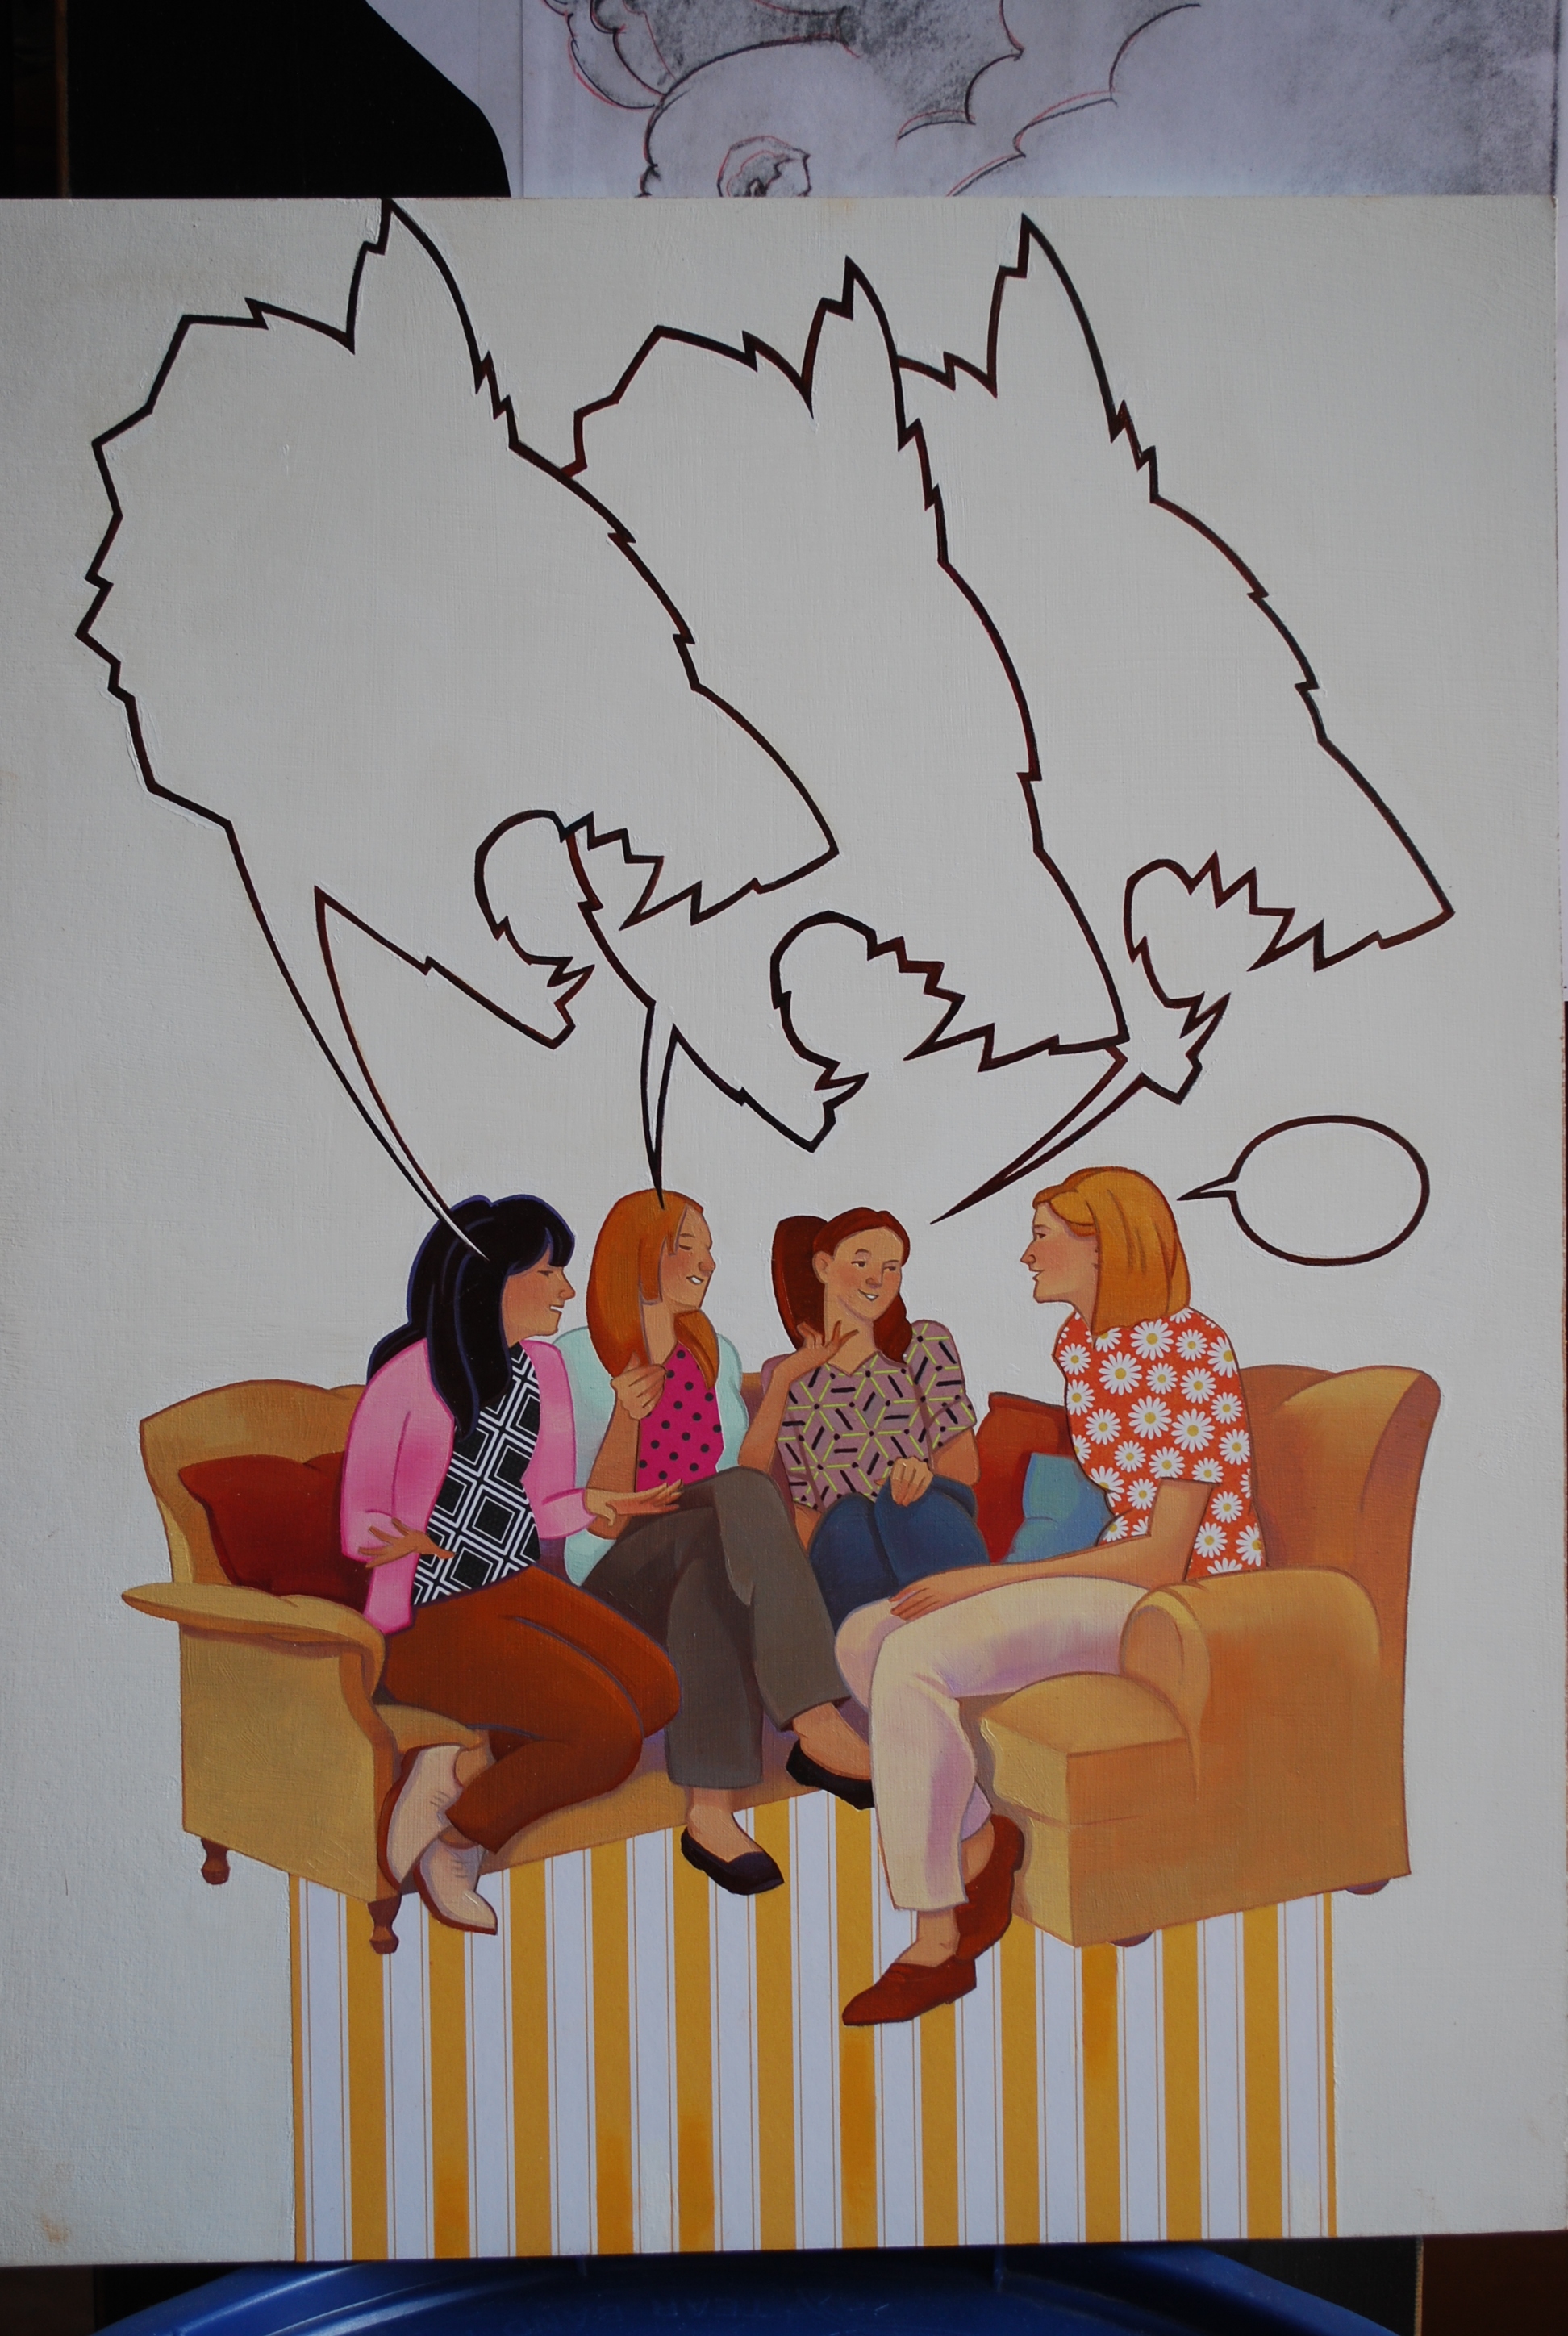
Siz and Driz and the publishing world.
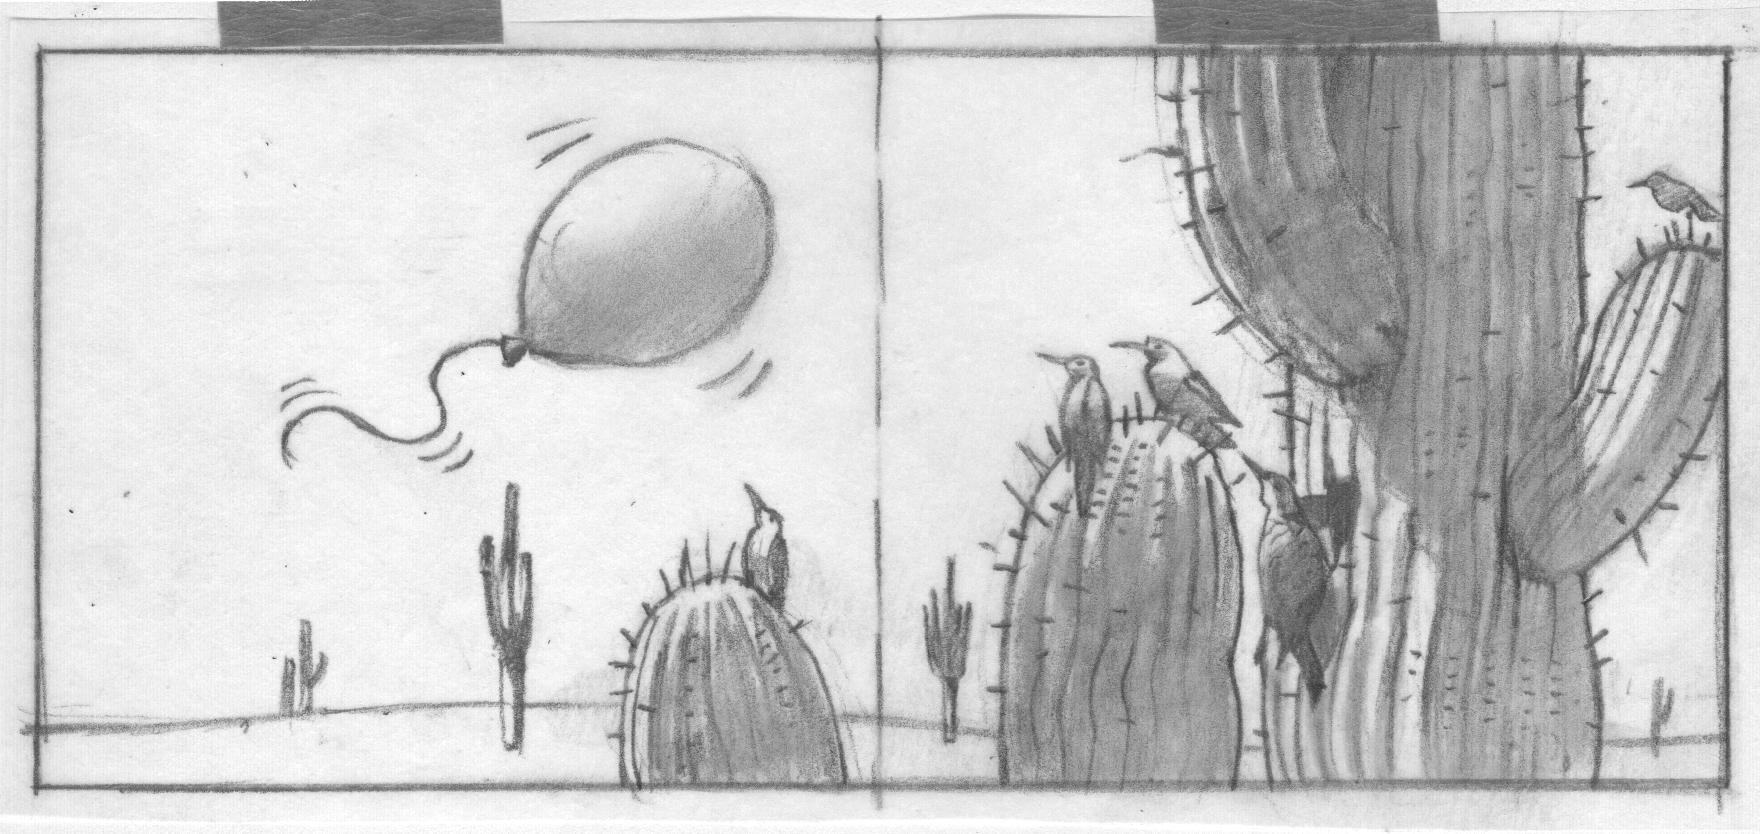
This is my first “fully-operational” illustration for the Siz and Driz storybook, “Around The Corner”. Look out for flarbs and snarbs. I submitted this and my stories to an agency on February 16 of this year. I haven’t heard back. On March 17, if I haven’t heard anything by then, I will hit the trail again, submitting the world of Siz and Driz to another agency. They will not go quietly into the night! They will live on! (movie buff).
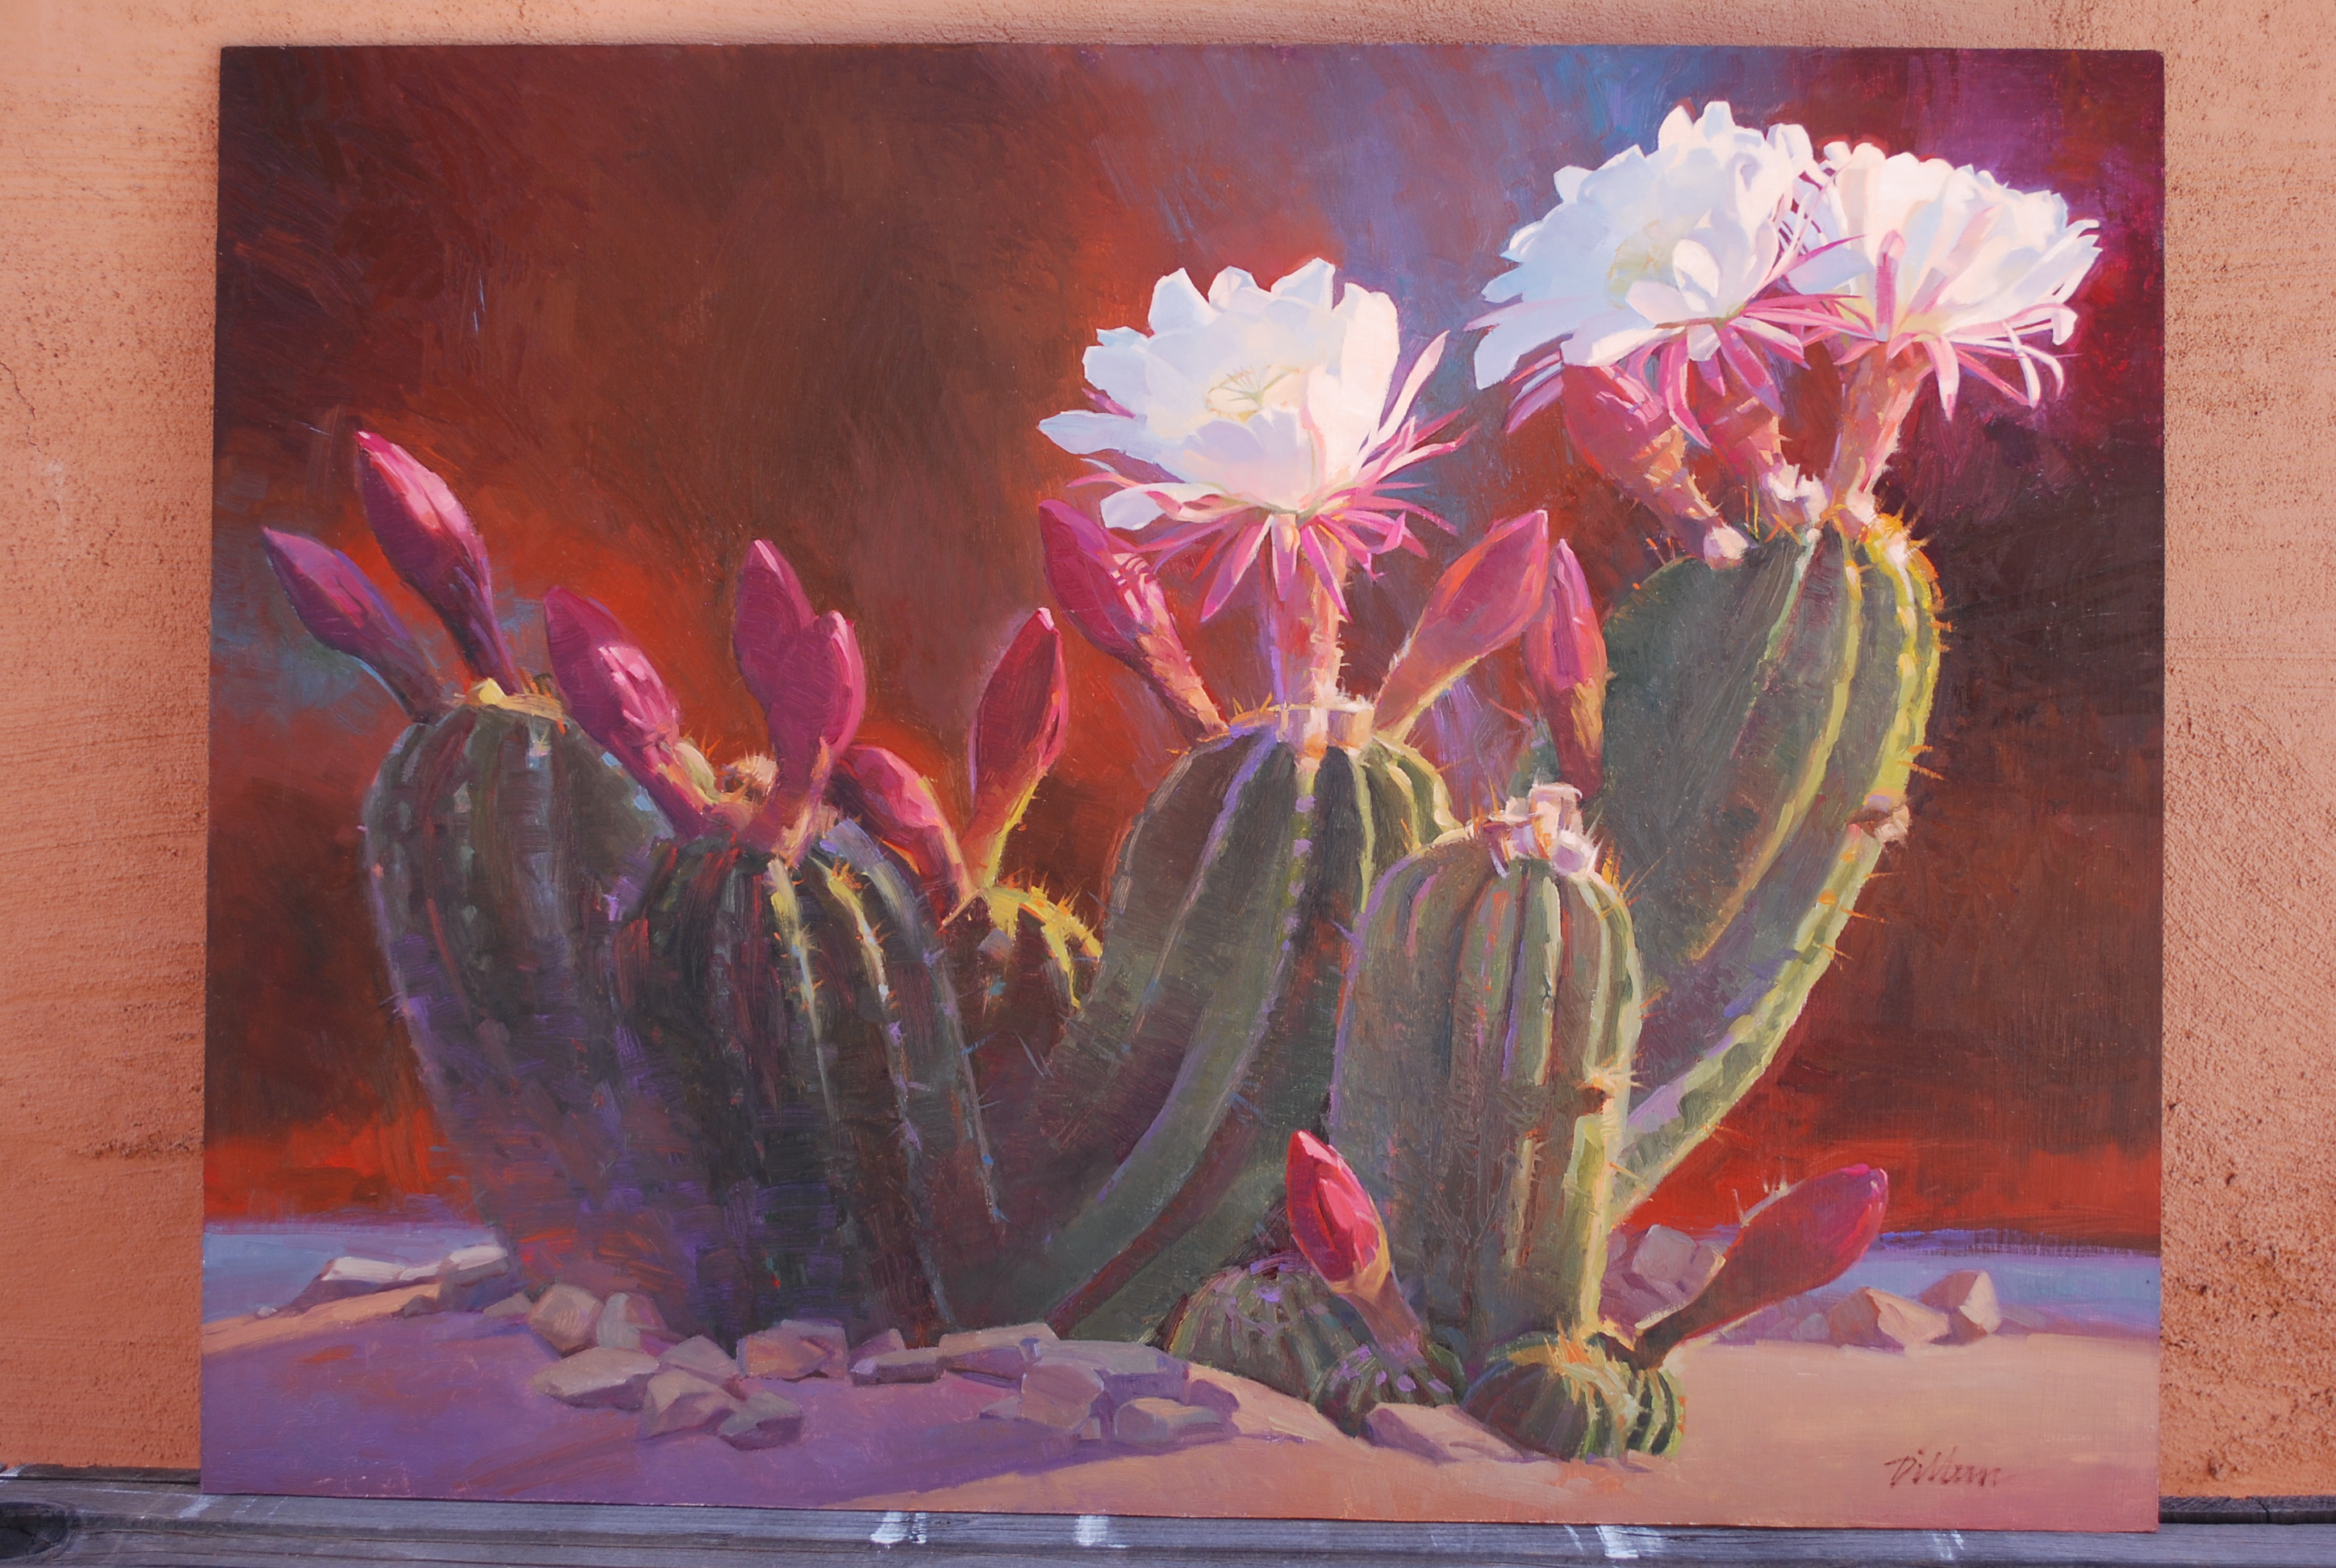
The other one that sold as well as being awarded an honorable mention.

This was the other painting that sold at the Dixie Sears Gallery Invitational. And surprise: it was awarded an honorable mention as well. Too much fun! This one is a 12 x 16 inch oil on board titled, “At 5:14pm The Autumn Geysers Erupted”.
Sold both of my paintings at the Dixie Sears Gallery Invitational. Just sharing the joy.
This painting sold at the Dixie Sears Gallery Invitational. It is titled, “Abundance”. It is a 24 x 18 inch oil on board. Yaa-hoo!
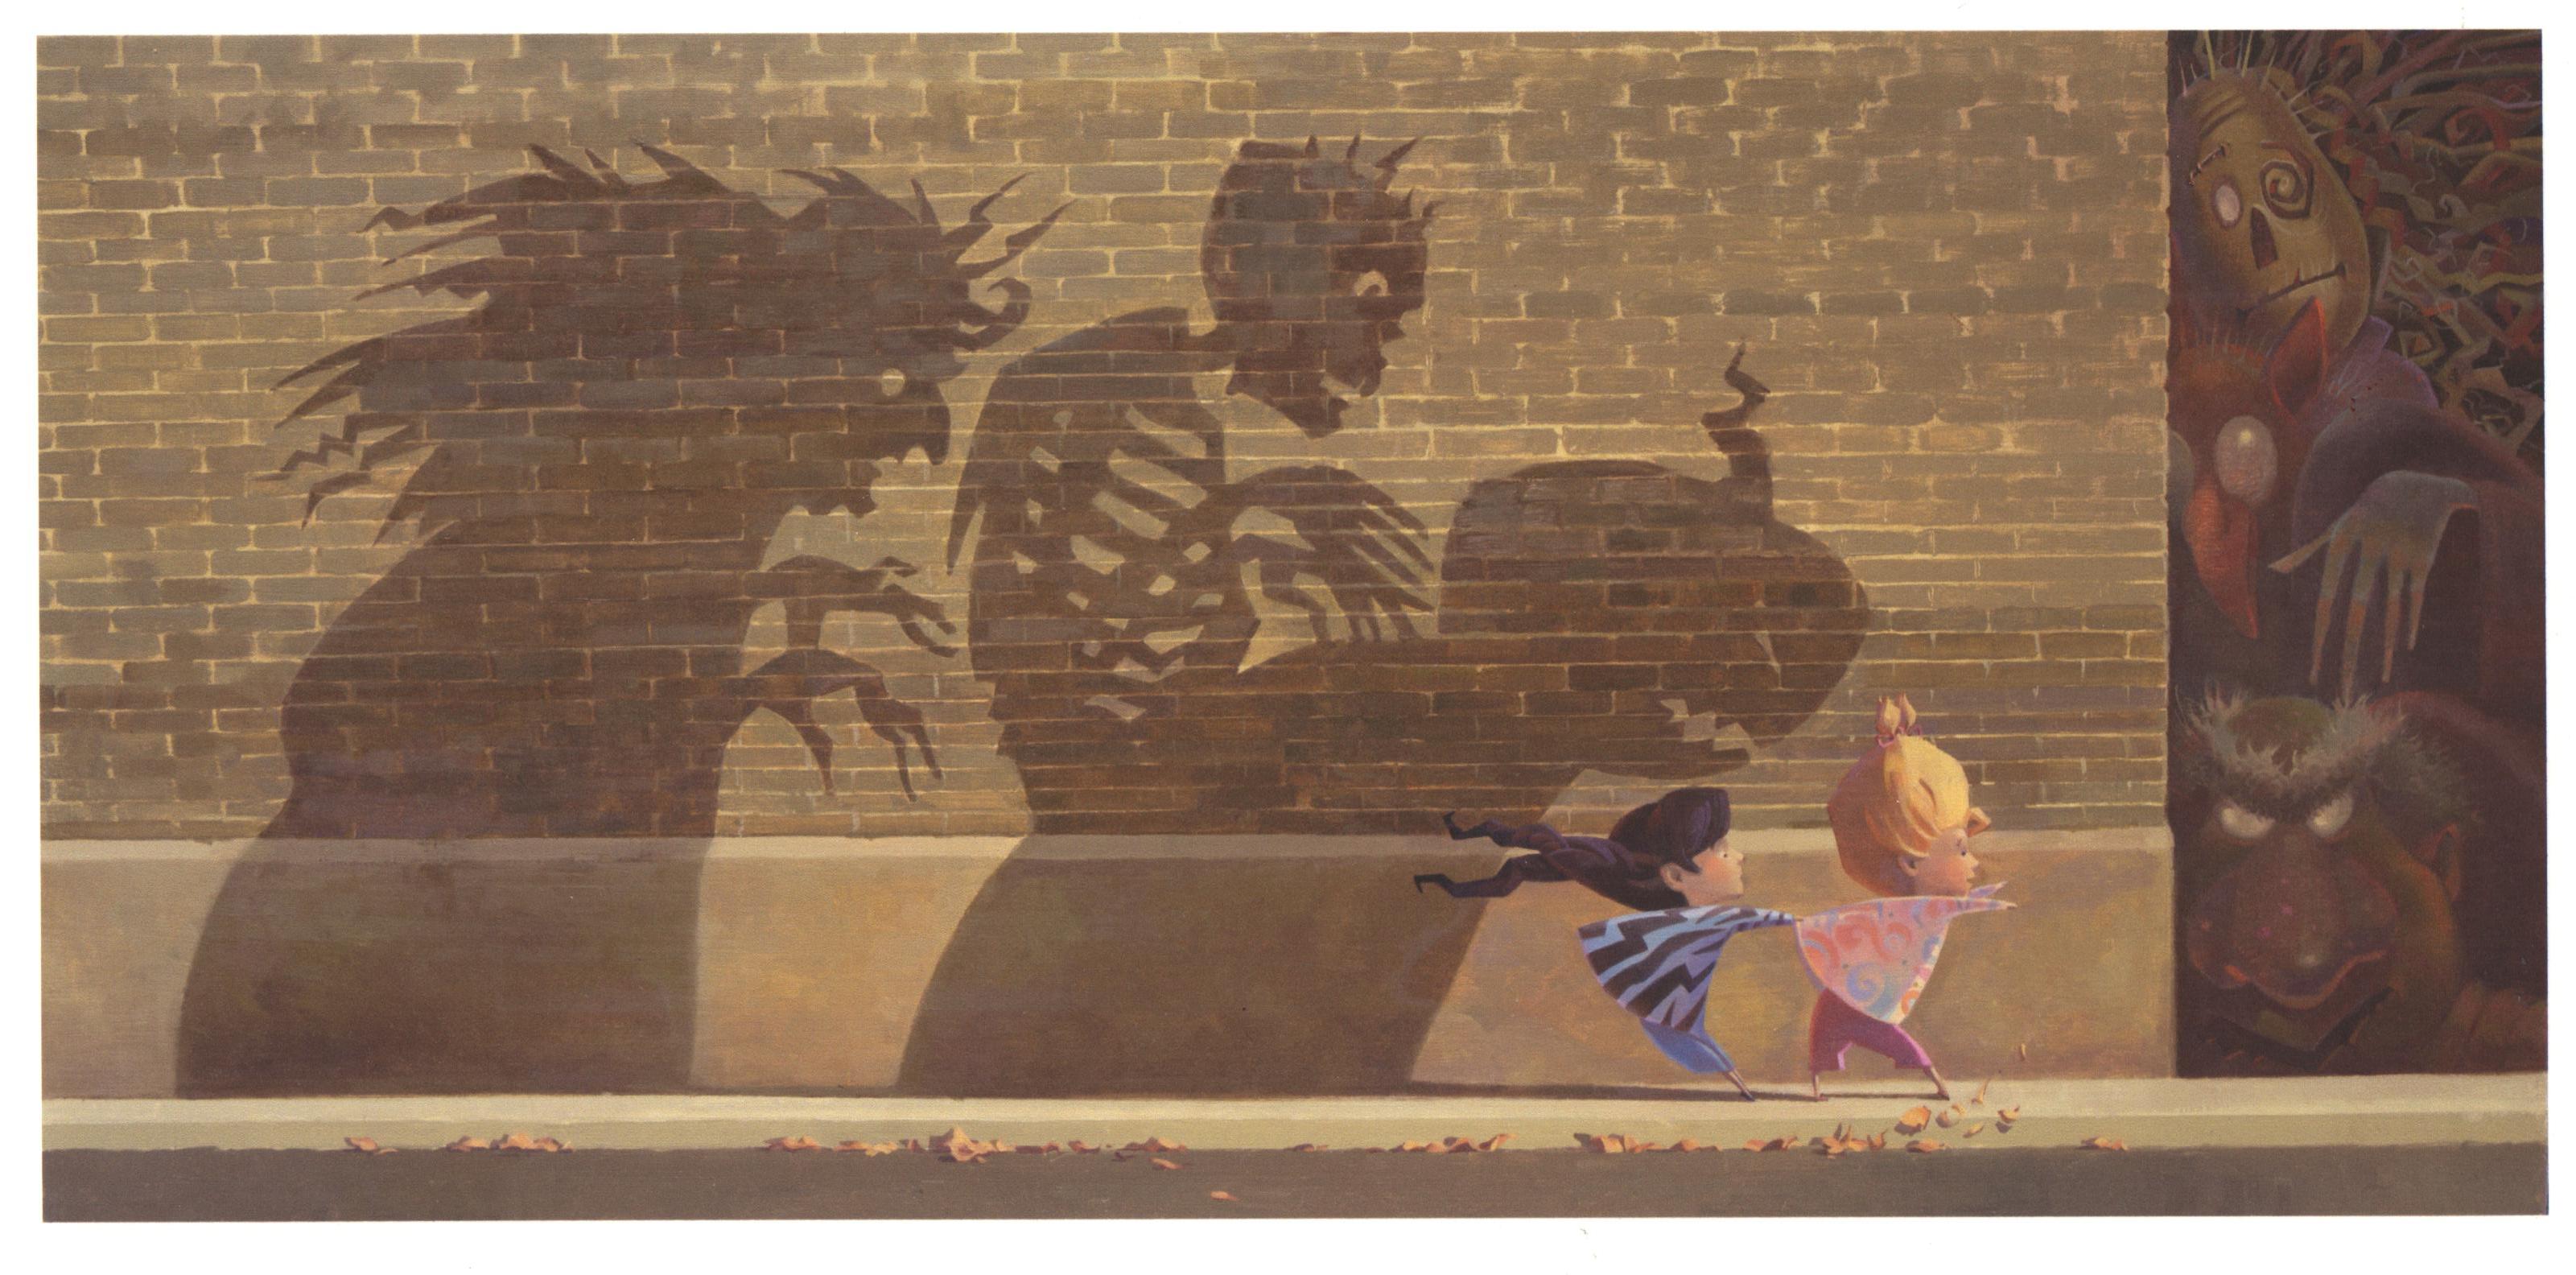
Continuing to pursue the dream of publishing as an author/illustrator! Introducing Driz and Siz, little starlets of stories, “Around The Corner” and “It Is What It Is”.
Today, with trepidation and relief I clicked the “submit” button on my story submissions to a literary agency in New York. I am pursuing the process of getting an agent to represent me as an author/illustrator. It has been a year since I sent three publishers a rough outline of one of my stories, “Nightmare Roundup”. I never heard back from any of them. I am wiser and my stories are more refined this time around. I will start with finding an agent. I am reminded of a clever dialog that passed between Buffy the Vampire Slayer and her friend, Willow: “How do you get to be RENOWNED? I mean, like, do you have to be NOWNED first?” -Buffy. “Yes. First there’s the painful NOWNING process.” -Willow. It WAS painful. After the writing, rewriting, rewriting, rewriting . . . and drawing, redrawing, redrawing . . . I thought I had all that I needed to submit my stories. Sat down to submit my stories online and remembered to make a copy to mail to myself for copyright purposes. Copied and packaged stories and sketches. Drove to post office and discovered I was 14 minutes past their closing time. Went back to the computer to attempt submitting again. Carefully worded and filled out the electronic form to the point of submitting when our cat, Frankie, chose that moment to jump up on the computer keyboard and erase all my work. I burst into tears. Composed myself and started again. Pushed the submit button and got an air message that said my 8000KB file was too big for their requested 800KB attachment size. Was really bummed. I am not so computer literate that I could fix that on my own. That was Saturday night. Was inspired Sunday in church with this line from a speaker: “Recognizing something’s potential and not giving up on it.” Monday I got help from a very generous Alphagraphics computer tech, Kathy, who reduced the sizes of my attachments. Have spent the day, today, Tuesday, submitting three stories for consideration. Now the waiting. I feel peaceful. God called and I have just been picking up the phone . . . pursuing the inspiration of these stories and the desire to be published as an author/illustrator.

Fearfully cautious Driz and bubbling blissful Siz. Seven year old sisters adventuring around corners and across playgrounds.
Directions for Creating a Possibility Poster

Choosing a colorful background.

Doing the poster work.


Katie’s eyes and gold pencil charts.
Katie and I invited our next door neighbor, AJ Hurst, to join us in creating these posters for the new year. Therefore, these 2013 posters were produced by a 15, 22, and 60 year old. These can be an art project with any age. I think even younger children would enjoy creating a visual of their hopes, dreams, and possibilities for the new year.
1. Take some time to write down your 2013 possibilities. What projects, intentions, goals, etc. do you have for the new year? Really throw your hat over the wall and write down those things that are always nagging the back of your mind but never get handled. This could be the year!
2. Pick a poster size and color. Our posters were 13 1/2 x 21 inches on colorful art paper. You could use white poster board, but, a bright color background seems to get the art juices rolling.
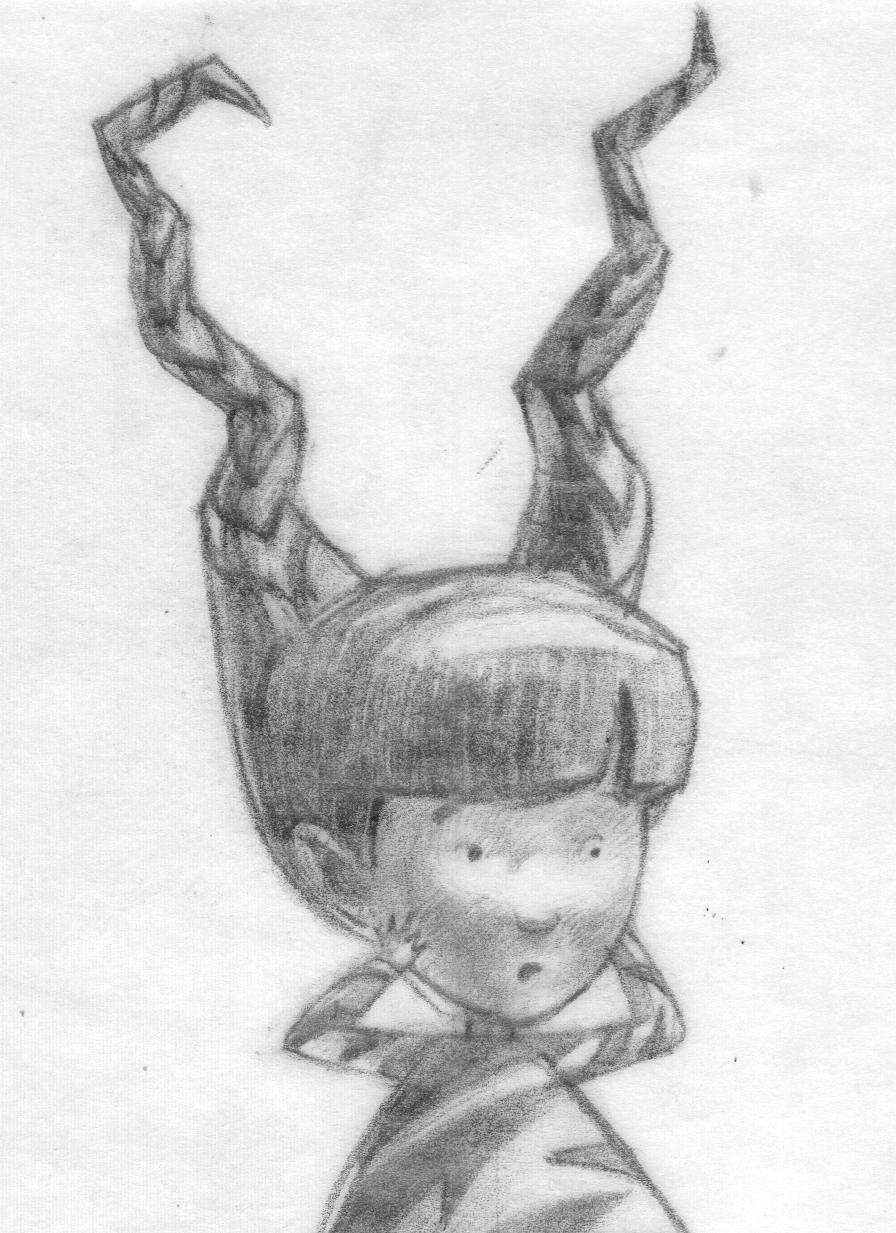
3. We took a photo of each other with a digital camera. Could have been with our phones. Transferred the photos to the computer and printed out a black and white copy to paste onto our posters. Last year my poster had a color photo of me. This year a black and white allowed me to do some creative coloring. Putting your face into your 2013 possibilities is a great place to start the planning from. After all, this is a visual of your intentions. I put my face upside down, Katie used just her eyes, and AJ not only used her head but several little full figures in various poses of herself.
4. Materials: photo copies, magazines, color cardstock, markers, color pencils, scissors, glue. I’m sure that 3-D items would work too. Whatever you wanted to put into your collage. The collage items will represent your goals, thoughts, themes for the year. I picked an overriding thought from the musical, “Les Miserables”, to headline my year: To love another person is to see the face of God. There are also “charts” on my poster that I can mark off as I accomplish them. My column of “the unexpected” is my longest column. The poster will also become a history of 2013.
5. Hang the completed poster in a place that will keep it ever present!


