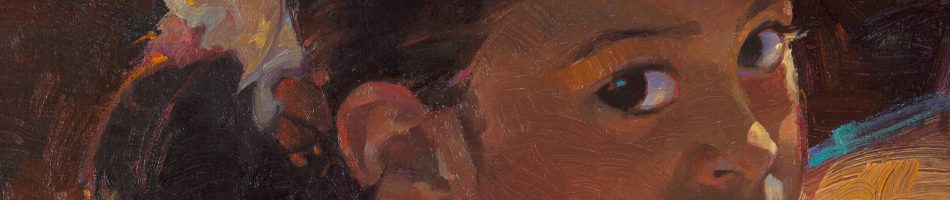
An Art Project that begins with a black line in Zion National Park
I had the privilege of trying the Art Project That Begins With a Black Line in a plein aire setting. A family from Ohio was visiting Zion National Park. Months in advance the very wise and energetic mother of 7 had arranged with the park for personalized art instruction for two of her children, girls, 11 and 14. Park officials found me through word of mouth and I was happy to do it. For two hours we looked at one of the main features of Zion National Park, the Watchman rock formation. We looked for straight, diagonal, squiggly lines. Discussed colors and their complements, lights and darks, shapes, and the freedom of expression. For example: The sky can be any color you want it to be, but, consider that if you want it to look like “the sky” you need to make sure the value or lightness in color of the sky looks like sky compared to the mountain. Hence, a light pink sky. The light side of the Watchman mountain was one of the primary colors and the dark side was its complement. Then we anchored the mountain to the ground with a darker value color and added texture. Altogether we explored art elements and really looked at the very mountains and rocks they had come to see while visiting the park. They were great young artists to work with. 
An Art Project for Kids that starts with a black line. Go to ARCHIVES March 2012 and scroll through the paintings to get to the directions for this project.


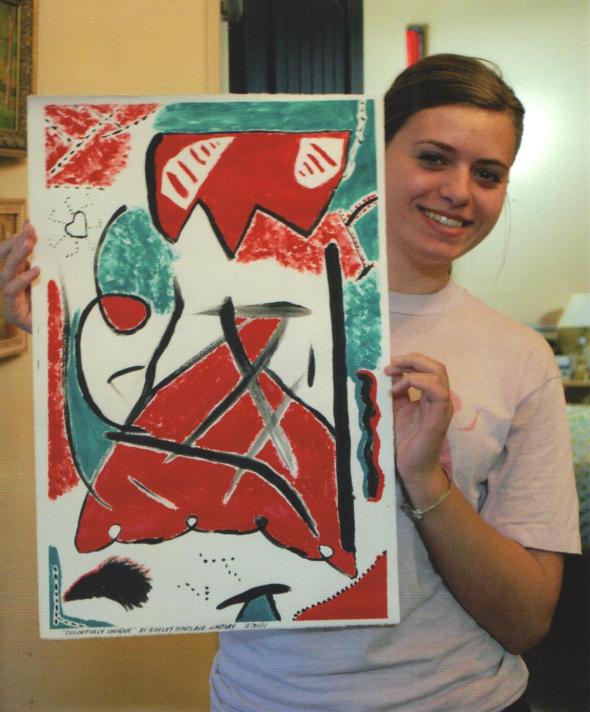

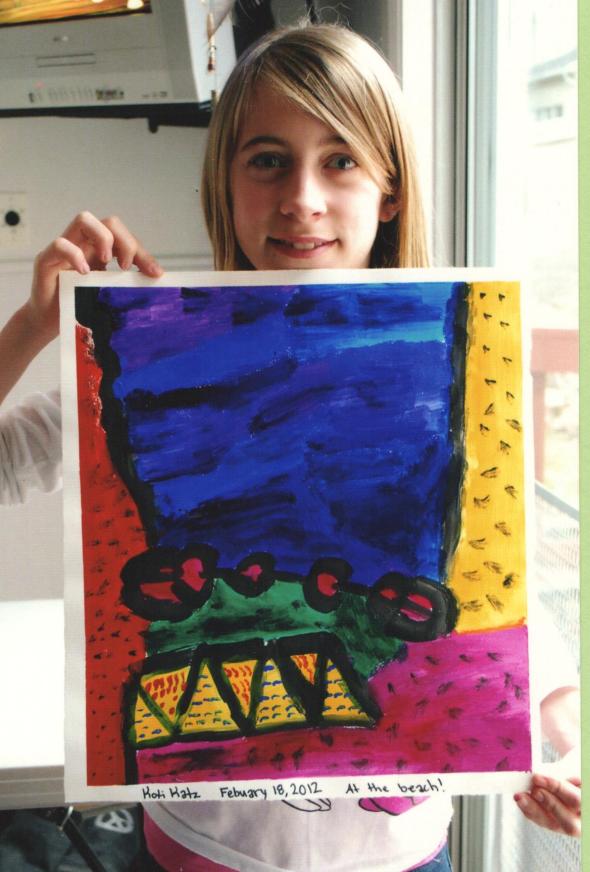


Adding additional colors from the six Primary and Secondary Colors.
Sometimes after the entire painting has been filled in with color, the artists like to go back in and paint over their black lines to make sure they show up. This removes some of the stress of having to be overly careful about getting paint on their black lines.
Beginning to add DOMINANT COLOR.
After the black lines dried, the artists filled in some of their bigger shapes with a variety of one of the three primary colors.
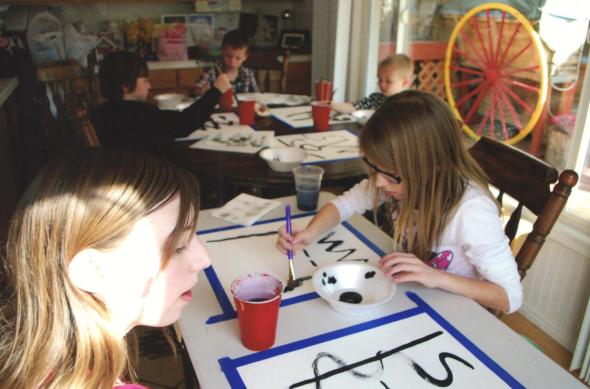
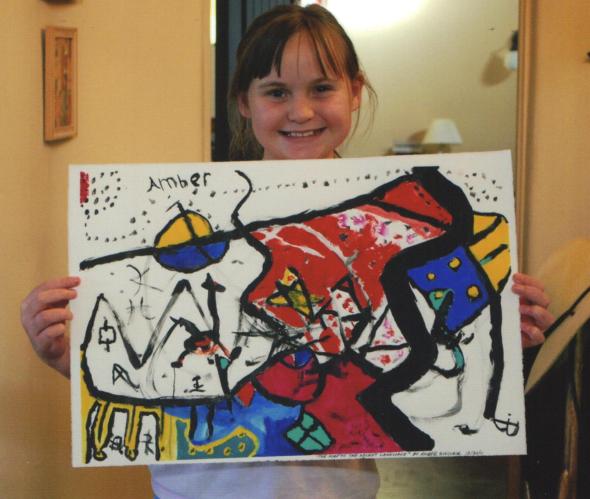
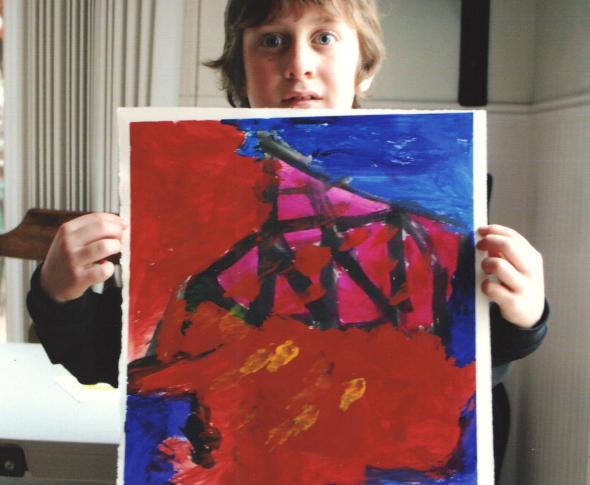
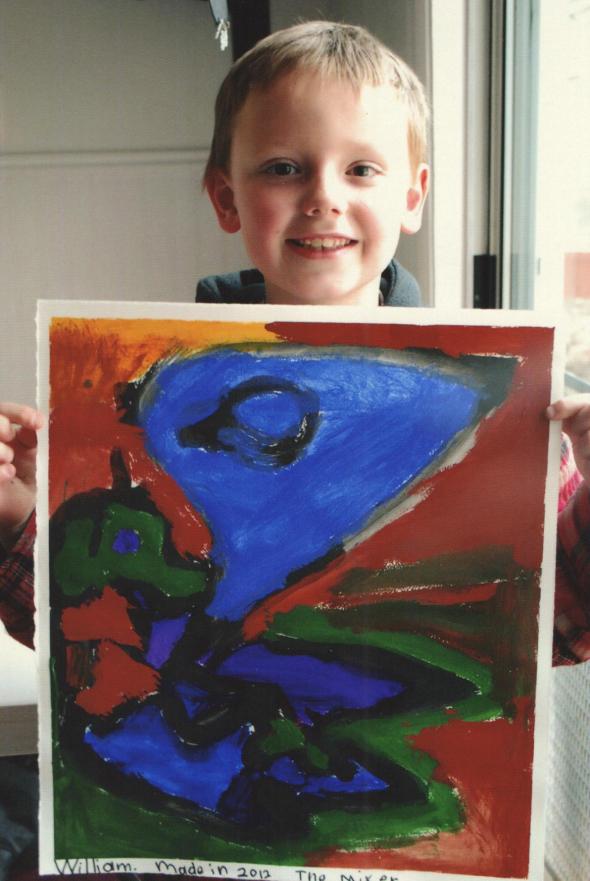
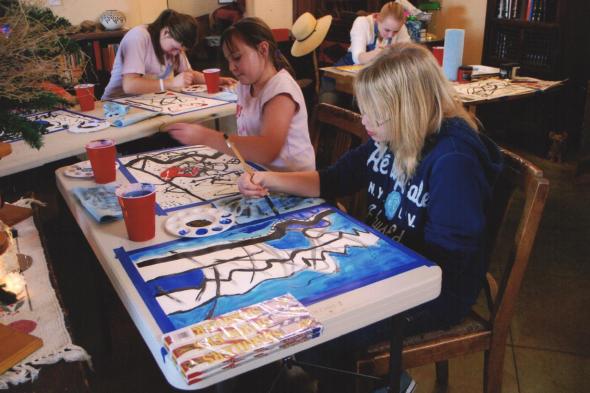
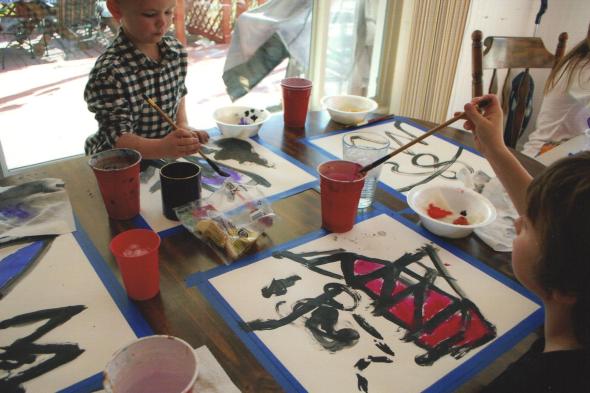
An Art Project for Kids: Exploring line, shape, and color in a painting
Over the last couple of months I have worked with children from the ages of 4 to 21 (yes, they can still be considered children) in a painting project that explores line, shape, color, and final presentation. The results were fabulous. These are the steps taken:
1. Use quality materials. Tape 90 lb. watercolor paper down to a solid washable surface. Overlapping the tape onto the watercolor paper about a half inch and firmly pressing it down will give the painting a built in white frame when you carefully peel the tape off. Use acrylic paint. Not poster paint. Acrylic paint is water soluble for easy clean up and has brilliant and intense color.
2. Explore the art element of LINE by asking the artists to paint a straight line, then a squiggly line, then a fat line, a zigzag line, a thin line, a diagonal line, a broken line. You get the idea. Use only black paint. Have them connect some of the lines to make SHAPES, another art element. While the black lines are drying go play a game or go on a treasure hunt.
3. When the black lines are dry introduce the PRIMARY COLORS of red, blue, and yellow. Have each artist pick one of those three colors to be the DOMINANT COLOR of their piece. Have at least three versions of each of the primary colors. For example, if a child picks RED to be their dominant color give them three different reds (like a dark red, magenta, or orange red) and some white so they can have VARIETY in their dominant color. Have them fill in some of their large black line shapes with their DOMINANT COLOR so that it is . . . DOMINANT in their painting.
4. While their DOMINANT COLOR is drying introduce the SECONDARY COLORS of green, purple, and orange. Talk about how you get and alter colors by mixing them with other colors. Have the artists fill in the rest of their painting with any of these other colors, filling in all the white spaces and painting right over the edge of the tape. Now, go play another game until the paintings dry. Or, if you are in a hurry you can pull out your hair blow dryer and speed the drying time along.
5. The final part of this Art Project for Kids is part poetry because they need to come up with a name for their painting. Have them rotate and look at their wonderful piece from all four angles and consider what they see or what emotion the piece conveys. It is exciting to carefully peel up the tape to reveal a clean white frame around all sides and then to sign and title . . . just like a professional artist.
Starting with black lines.

The first step in this painting project was to experiment with LINE. We used black paint to make straight, squiggly, zigzag, diagonal, thick and thin lines.
Getting a book proposal ready to send off to the publishing world.
 The war against fear and lethargy continues! Spent the week putting final touches on a book proposal to send out into the publishing world. The title of the book is “Nightmare Roundup”. I’ve written the story and created small size preliminary color drawings to go along with the story. These drawings are just “roughs” to show what a finished piece of art could look like. They also show the action of the story since this is going to be a picture book. Synopsis: There’s only one tough little girl that stands between us and our nightmares. It’s one of her chores. But it’s not just scary monsters she has to face-she has to face her Ma! Then there were some hours spent on the internet looking up publishers and their submission guidelines. I started with 13 publishers I listed from Caldecott winning children’s books that I have in my home library. Only 5 of them might even look at a book proposal that hasn’t come through an agent. Those 5 will only let you know if they have received your submission if they are interested in your book. And that could take months. So, when I send my stuff off into the publishing netherworld I will let it “fly my pretty” and start the next book idea right away. I will need at least 3 fleshed out story proposals to approach an agent with. Patience, patience, patience . . .
dilleenmarshwomanartistrenaissance

A WOMAN ARTIST at home with her RENAISSANCE.
HOWDY WORLD! In June of 2011 I was diagnosed with cancer. The BIG “C”! The death sentences for the possible kinds of cancer I had ranged from 5 years to 18 months. I mentally started cutting my “bucket list” shorter. After 6 months, 6 doctors, 9 tests and procedures I was told that “there was not one abnormal cell in my body”. REBIRTH! Which is also a definition for RENAISSANCE. A Renaissance Woman is one skilled and knowledgeable in many fields. My art life embraces many fields. The acronym for Woman Artist Renaissance is WAR. I say WAR with a bit of a chuckle because I’m not a flaming activist when it comes to some of the issues that beset the art world: women artists getting their due in a man’s world, realism versus esoteric art, illustration versus “fine” art, etc. My Woman Artist Renaissance WAR will be waged against my own lethargy, apathy, and retirement. My military strategy is to thwart being too busy, too shy, too tired to engage and share with others my art life. In the blogging process I may be of assistance to some and be assisted in return. I am a designer, illustrator, painter, think tank, storyteller, and mentor ARTIST. YEE HAA!
